


Making A Steel Bench Vise Clamps & Vises
Before getting started on the steel table build, I had a look for a bench vise. My experience with the lower cost vises was not positive, in that I’ve owned two and broken two. The first split along the “anvil” surface (flat area behind the fixed jaw) from pounding out metal on it. Since then, I’ve been told that this is not to be used as an anvil. If that’s the case, why make it so darn attractive to use like that? Machined flat, the right size and in a good location.
The second one broke where the lead screw threads in. I tried to weld this together again, but the repair didn’t hold.
Both of these vises were made from cast iron. Cast iron is perfect for making cheap vises, since it is a cheap material itself, has a relatively low melting point, good fluidity and castability. However, it is brittle and not as durable as most other iron alloys, like steel, for example. It is also very difficult to weld effectively, so repairs to a fracture are usually not long lasting.
Steel, as a vise material is fairly uncommon and I was taken aback by some of the prices I saw for such vises. Even the better quality cast iron units (ones that use ductile iron) came with a hefty price tag, especially the larger ones. Confronted with this dilemma, either settle for cheap and hope it doesn’t break, or empty out my bank account to obtain a vise of good quality, I went with the third option: take a shot at making one myself.
I made a video of the build, highlighting the details:

I used 2″ x 3″ rectangular tubing for the majority of the vise. Here are all of the parts cut and ready to assemble:
.jpg)
The vise uses a 1″ threaded rod as a lead screw and what it screws into must be strong. I’ve used two 1″ nuts, welded to two thicknesses of 1/2″ steel bar stock:
.jpg)
.jpg)
This is bolted directly to the table surface.
Much of the assembly done, the lead screw is tried and measured:
.jpg)
.jpg)
This vise has a fairly large capacity, with 6″ wide jaws and more than 6″ throat depth.
The vise finished, ready for paint:
.jpg)
After cleaning the parts with mineral spirits, I sprayed on three coats of paint:
.jpg)
.jpg)
The parts were left to dry a full day before putting the vise back together.
The finished vise:
.jpg)
.jpg)
The tomato paste can was no match for the raw power of this new vise. Not much of a test, but something interesting to crush:
.jpg)
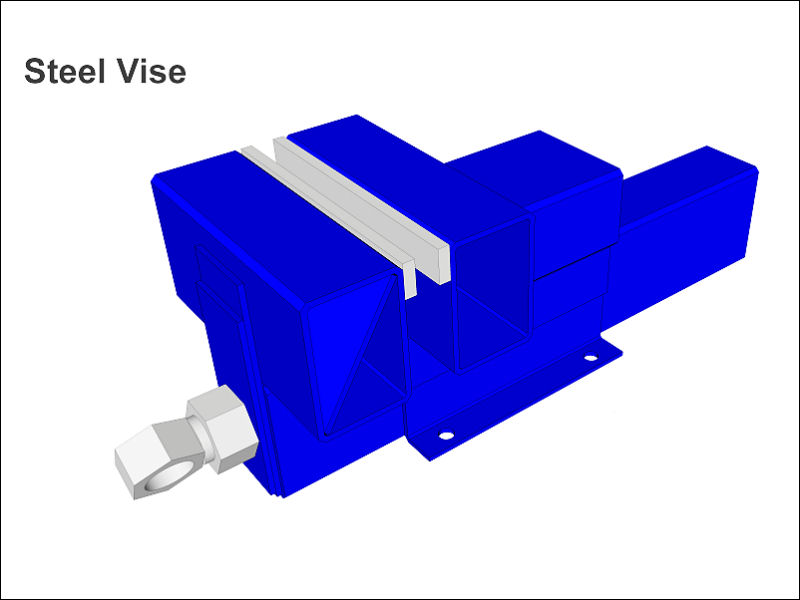
It took me roughly a day to make this vise complete. This is thanks, in large part, to the very accurate SketchUp model. All I had to do was cut out the parts and weld them together, with very little adjustment required.
Cost was low; the only items I had to buy were the threaded rod, nuts and the welding wire for my machine. The rest of material I already had, from various sources.
Regardless of the money saved, I now have a good vise that can withstand some abuse and if I ever break it, I can certainly repair it.
Originally, I made three longer videos that show more of the detail, but don’t have any narration. I also did a brief demonstration video where I crushed the can pictured above, and those videos are available to watch here in a playlist.


