


Making A Wooden Vise Clamps & Vises
When you’ve spent more than half your lifetime working in construction, you’re bound to see a few of these:
.jpg)
It’s a leveling leg for metal scaffolding. It features a coarse, ACME type thread and is made from solid steel. At 24″ long, I figured it would be perfect as the lead screw in a good sized vise.
These have been crimped, to stop the nut from going up too high, and these threads need to be repaired before the nut can be taken off.
It’s just a matter of removing the metal that was crushed down between the threads, and this can be done with a grinder or file. This doesn’t take long and will have no effect on the performance of the screw.
.jpg)
The restored threads:
.jpg)
.jpg)
The screw cut to the length I needed, about 19″.
For the ‘head’ of the lead screw, I need stock that is 3″ thick and I glued two pieces of 2″ x 4″ together to make the part:
.jpg)
.jpg)
I then cut it to final size and marked the centre on one end. Using my compact compass, I drew a circle to define the shape.
At the drill press, I bored a 1-5/16″ hole, about 1-1/2″ deep to receive the end of the lead screw:
.jpg)
.jpg)
A 1″ hole is drilled through the head, centred about 1″ from the end. I used the band saw to cut it out round, then cleaned up the cuts on my disk sander.
Polyurethane construction adhesive is used to glue the lead screw into the head:
.jpg)
.jpg)
I took the time to make sure there was complete coverage on the screw and in the hole, and scraped off the excess. As it dries, this adhesive blisters out around the screw and it’s a good idea to remove this before it gets too hard. I set this aside to dry overnight, and that is the minimum dry time I would recommend for this glue. Even if it appears to be set, full strength may not have been reached.
Getting started on the moving jaw, the parts are cut to length and width:
.jpg)
These make up the part of the jaw that slides in and out. I’ve chosen to make this vise almost entirely out of solid pine, but a better choice would be a high quality plywood, like Baltic birch. One thing to note: when using solid wood, you need to pay attention to grain direction, to avoid cross-grain glue joints as much as possible. It’s also a good idea to use well seasoned wood that is at the right moisture content. I’m working with the last of the red pine that I bought for this floor, so it has had ample time to dry out.
Before getting started on cutting out the parts, I ran all of the pieces of pine through the planer, to ensure they were all exactly the same thickness.
The jaws of the vise are made with stacks of individual blocks, glued together. Here, the blocks have been cut to rough size:
.jpg)
.jpg)
I free-hand drew the curve of the jaw on one block, cut it out on the band saw, then used it as a pattern for the rest. The two longer pieces extend down to join with the horizontal part that slides in and out.
Gluing the blocks together on a piece of melamine to keep it in line:
.jpg)
.jpg)
The moving jaw, fully assembled:
.jpg)
.jpg)
When the glue dried, I sanded the jaw smooth and to final shape. Where the vertical jaw meets the horizontal is the only significant cross-grain glue joint. Given how narrow the parts are and how well seasoned the wood is, I don’t think this will be a problem. Using plywood would avoid this altogether.
The sides and top of the fixed jaw are cut next:
.jpg)
.jpg)
They fit around the moving jaw loosely, leaving some space for the jaw to move in and out freely.
More blocks are cut to in fill between the sides of the fixed jaw:
.jpg)
.jpg)
I made one of these blocks from slightly thicker wood, to make up for the space between the fix jaw and the moving jaw. A couple of pieces of contrasting colour veneer sandwiched in could also be used, and could be an attractive feature.
Where the blocks meet the top of the fixed jaw, there is another cross-grain glue joint, but this one is unavoidable.
Most of the strength of the fixed jaw comes from the sides, and these need to be oriented correctly.
Glued, clamped and set aside to dry:
.jpg)
The base is more solid pine, and here I’ve laid out the areas that need to be cut away:
.jpg)
.jpg)
Four holes are drilled and these will be used to bolt the vise down to the bench.
I made the handle from maple, cutting it to an octagonal shape on the table saw and rounding it out with a block plane:
.jpg)
The plywood donut beside it (photo above) is the keeper that goes on the lead screw inside the moving jaw. I used 1/2″ plywood for that, and it’s the only part that is not solid wood:
.jpg)
.jpg)
The handle is a loose fit in the hole that goes through the head. Later, caps will be added to keep the handle from sliding out.
After the glue had dried, I did as much machine sanding as I could, then used the block plane to level the areas that I couldn’t reach with the machines:
.jpg)
.jpg)
A test fit. The jaws should be matched at this point – same width, same height and meet evenly when pushed together.
At the end of the moving jaw there is a cap that fits in and covers the end. The lead screw goes through this, and I’ve marked the centre to be drilled:
.jpg)
.jpg)
With the lead screw inserted through the end cap, the keeper is put on and two #10 machine screws are installed to hold it in place. I drilled and tapped the lead screw for these screws. A roll pin could be used as well, and this would avoid tapping the threads for the screws, but I didn’t have one that was long enough.
.jpg)
The arms on the nut are cut to length so that it will slot into the base of the vise and the top of the fixed jaw.
At first, I thought it was going to be a problem mounting this, because of the way it is shaped. As it turns out, this is really easy to mount in the vise, as shown below.
The slot in the base is made using a 5/8″ bit and removing the material between the holes:
.jpg)
.jpg)
The nut just loosely fits in these slots. No glue or any other fasteners are needed.
.jpg)
The dry fit:
.jpg)
.jpg)
After I’m satisfied that everything lines up, the parts can be glued. The end cap is glued to the moving jaw, and the fixed jaw is glued to the base.
To finish off the fixed jaw, the ‘anvil’ is glued on. Of course, this will not be used as an anvil, but does add a lot of strength and covers the top of the fixed jaw:
.jpg)
.jpg)
The end caps are glued onto the handle. I made these from pine.
The jaw pads are maple and to locate them properly, I put just a small dab of glue in the centre of each one, then clamped the jaws shut until the glue dried. Gluing these on solidly would create another cross-grain glue joint, and it’s best to avoid that here:
.jpg)
.jpg)
Mostly for decorative purposes, the off cuts from cutting the arc shape in the jaw parts are glued to the side and base.
After the glue set on the jaw pads, I used 1-1/2″ screws to attach them:
.jpg)
.jpg)
To reinforce the side to base joints, six 2″ screws are countersunk and driven.
To paint the vise, I removed the lead screw by taking out the retaining screws that work with the keeper:
.jpg)
I gave the vise two coats of oil based polyurethane and let it dry overnight:
.jpg)
.jpg)
The next day, I bolted it down to my workbench using 3/8″ lag bolts:
.jpg)
.jpg)
Ready for action.
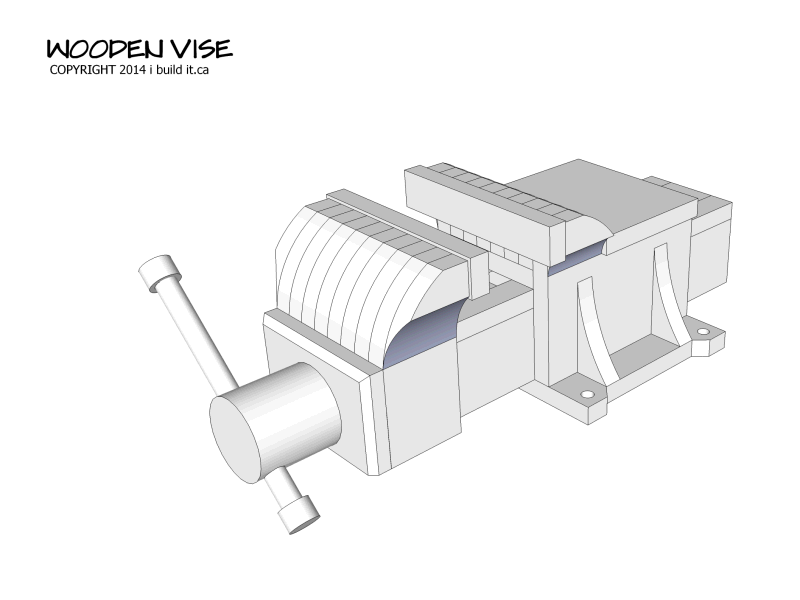
I made a video of the build showing all of the details from beginning to end:

 http://sketchup.google.com/download/
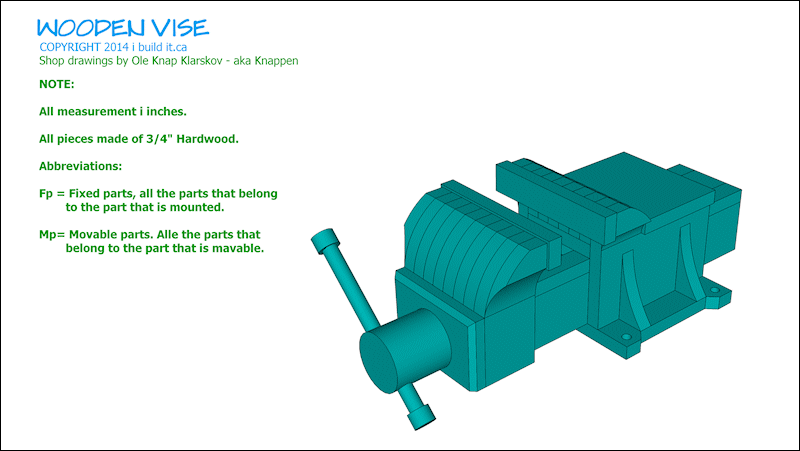
Ole Knap Klarskov has been kind enough to take the SketchUp model above and separate it into scenes with imperial(inch) dimensions:
Hessam sent me some picture of his vise build based on my design. Hessam has several projects posted on Woodgears.ca
.jpg)
This scaffold leg is not solid like the one I used, but more than strong enough to do the job.
.jpg)
Making the parts:
.jpg)
.jpg)
.jpg)
.jpg)
.jpg)
.jpg)
.jpg)
The finished vise looks like it’s ready for serious work:
.jpg)
.jpg)


