


Melted Tool Repair (Brush Replacement) Workshop Projects
by Don Heisz
Some of you more dedicated readers may recall some time ago I wrote an Offcuts article entitled More Melted Tools in which I described how the plastic brush housings in two cordless grinders had melted due to heat from using the tools – used properly, in my opinion. Anyway, I mentioned that I believed a cordless circular saw had suffered from the same problem. That saw, at the time it stopped working, had just been used to make several long cuts in fairly heavy aluminum stock. I think that’s what wrecked it.
I had a replacement for the saw and was using that quite happily until a number of things occured. First, I continually dropped it until the aluminum base plate broke. I needed to keep using it so I hastily added a piece of steel onto the bottom which reduced the available depth of cut but made the saw perfectly useful. It stayed like that until I was cutting something that jammed in the blade and ended up shattering the guard. So, here’s what that saw looks like:

And here’s a view of the bottom:

It was originally my intent to take the base from the older, burnt out saw and put it on the other one. But, since the blade guard broke, it seemed like it would be a better idea to try to fix the burnt out saw. This was actually spurred into action because I needed to replace the brushes on a cordless rotary hammer drill. Since I found a source to purchase all the necessary parts, I decided to not only fix the burnt out saw, but also one of the burnt out grinders (I think I gave the other one to John).
So, here is a burnt out grinder with the replacement parts …. except, in this picture, the brushes are actually for the circular saw. Consider it a prop.
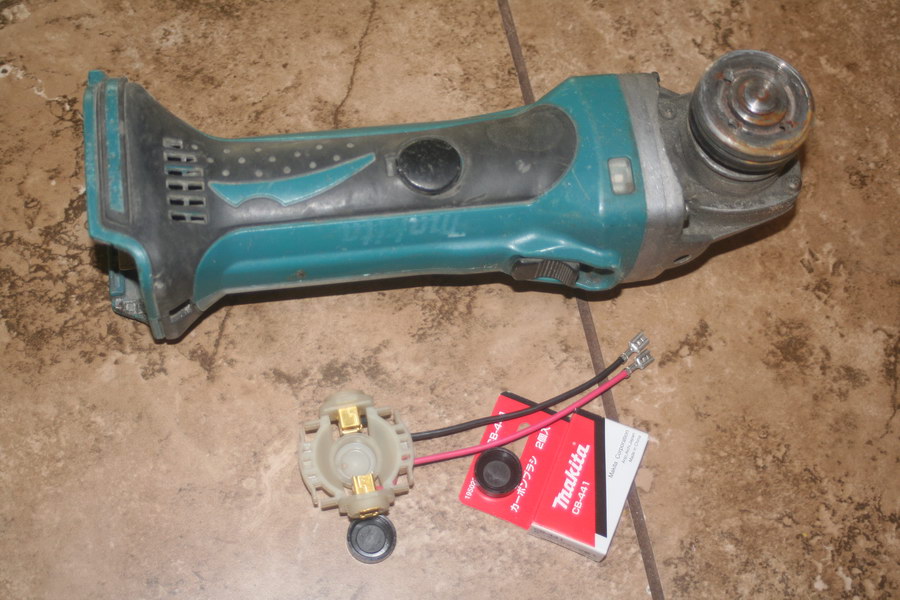
Those of you who are familiar with what one of these grinders is supposed to look like will possibly recognize that something is strange. I rotated the gear housing to make the switch location more intuitive. The way this thing is manufactured, it seems it can face any direction (however, it makes no sense to have the blade and the switch on the same side (which I momentarily did…)).
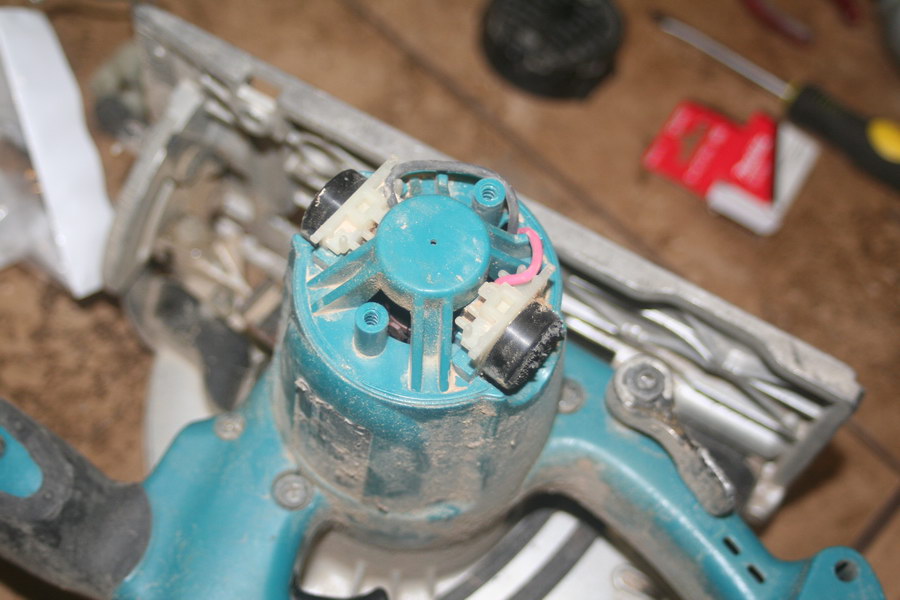
Anyway, with the removal of a few screws, it comes apart:

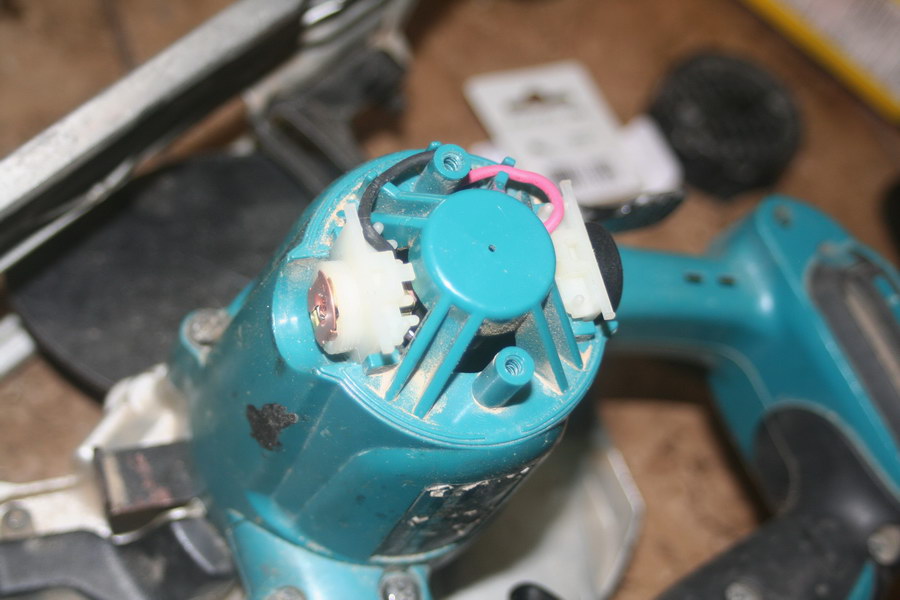
The old brush housing pulls out and the new one clips in. It’s like these were made to be easy to replace.

Then you shove everything back together, drive the screws, and you can slip the new brushes into place.


A standard screw driver easily turns the non-melted new plastic retaining caps onto the new brush housing – until they too melt, that is. Good luck removing them, if you ever need to.

And that’s it. I think it took about 5 minutes.
Then I turned my attention to the circular saw, which I had never dismantled before. Ah, but I thought it would be just as simple as fixing the grinder. Looking at the end cap of the motor housing, I figured I could fix it by removing those two screws.

And, sure enough, the brush housings (there are two) are easily seen and slipped out.
BUT! There are wires and the wires travel through the motor housing to the handle of the saw, where they connect to the switch. That explains why the replacement brush housing had 8 inches of wire…
One wire slips and is set directly in the switch via tightening a set screw. Here is the old wire dangling after I loosened the screw. Oh, wait, I had to remove EVERY OTHER SCREW in the saw, first, and take it almost completely apart. Luckily, that isn’t a big deal. Even the e-ring that holds the depth lever was easy to get off and put back on. It didn’t even shoot across the room.

The most frustrating part was trying to thread the new wires through the motor housing and get them where they were to go. You can see below the moment when I finally managed to get both wires through the channel. It’s just a matter or perseverance.
While one wire nicely slips into the switch, the other is twisted with two others and then heat-sealed in a plastic cap. So, I cut the wires and twisted them together and then wrapped a bit of electrical tape around them. Works perfectly well.


After that, it’s easy to put everything back together. Make sure the wires are all pushed out of the way of the screws you replace. I tend to not use a screwdriver to dismantle or reassemble things like this – I use an impact driver. Why? Because I’m in a hurry.
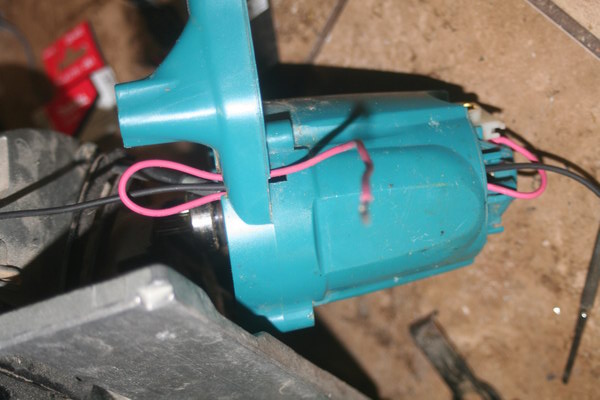
Here you can see the new brush housings and the brushes installed in the end of the motor housing. I’m pleased to report that everything worked.
So, why bother? That is the question of the day when it comes to very-nearly-disposable cordless tools – purely symptomatic of the general nature of our way of life, really. Almost nothing gets fixed, anymore. And, to tell you the complete and honest truth, when everything was added together, the cost to fix these two tools almost totaled the cost of buying a new saw (minus battery).
Well, at least I get two tools. The saw now replaces the smashed up saw and will likely work for a very long time (until I use it for something stupid). The grinder is simply a back-up, since I have better ones to use. It makes no sense to just throw these things away when the fix is easy and obvious. Or that’s my opinion.
Now I can take the smashed up saw and turn it into a cordless tablesaw. Or perhaps it would be better as a cordless radial arm saw.
The possibilities are endless.
Don Heisz is the author of Offcuts and of other occasional articles here on iBuildIt.ca.


