Tip: The Partial Dado Joint
Here’s one that I’ve used many times over the years, a thin dado to help align and strengthen a joint:
.jpg)
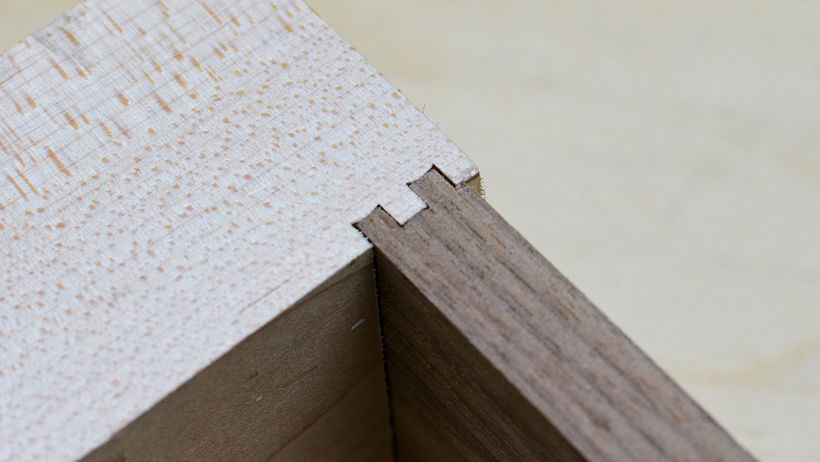
Rather than cutting a full width dado to join the parts, I cut one that is only as wide as the saw blade kerf. There are a few advantages to this method:
– you don’t need to set up a dado blade in the table saw (or use a router to cut the joint in several passes).
– it allows you to join two pieces flush with each other, as shown above.
– you don’t have to be overly concerned with the thickness of the stock you are joining.- it’s easier to calculate the size of the parts, just add 1/8″ to each end (1/4″ overall) to get the width.
– there really isn’t any loss of strength for most applications over a regular dado joint. When joining shelves to a side panel, putting the dado at the bottom of the shelf will provide maximum support.
For the sample above, I made a single cut with a 1/8″ blade for the dado, then cut the tongue that fits into it with the same blade:
.jpg)
.jpg)
If a wider joint is needed, I make two passes, as shown in the plywood example above, right.
This makes a 1/4″ wide joint that is still just 1/8″ deep:
.jpg)
This method can also be used to “finger join” parts together, by making a series of cuts regularly spaced for an interesting look that will have the added benefit of greatly increasing the glue area: