


How To Make a Sump Pit Home Improvement
by Don Heisz
So, it’s been raining. Pretty much every day, some rain falls. It’s been a far wetter year than any I have experienced here before. And a week or so ago, I awoke to the sound of a monumental deluge hammering on the roof.
I looked out the window. While I did not see any big boats going by, I did see that a river was flowing across my driveway. That, of course, set off my “Oh, great, the basement’s flooding” alarm.
I ran downstairs. Everything was fine. Good, I thought.
Some of you may recall that my basement flooded last year. If not, you can read all about in in Offcuts. Anyway, did I learn any lesson from that experience and put a sump pit in my basement? Of course not.
So, while the basement was dry when I looked the first time, twenty minutes later a trickle of water was running across the floor. I ran out to my shed and grabbed a pump John gave me last year. By the time I got back, the trickle had turned into an inch of water on the floor.
Luckily, I did not have anything on the floor that couldn’t get wet. So, after a full day of drying out the floor, everything was chaotic but nothing was destroyed. No damage done. And that was just plain lucky.
So, I decided I would put a sump pit in. Even though this flood was an oddity, something that pretty much never happens, the fact that I’ve had the basement flood three times over ten years with two of those times being just over a year apart is getting to be a bit much. And, really, what harm could a sump pit do?
I began by choosing a location.
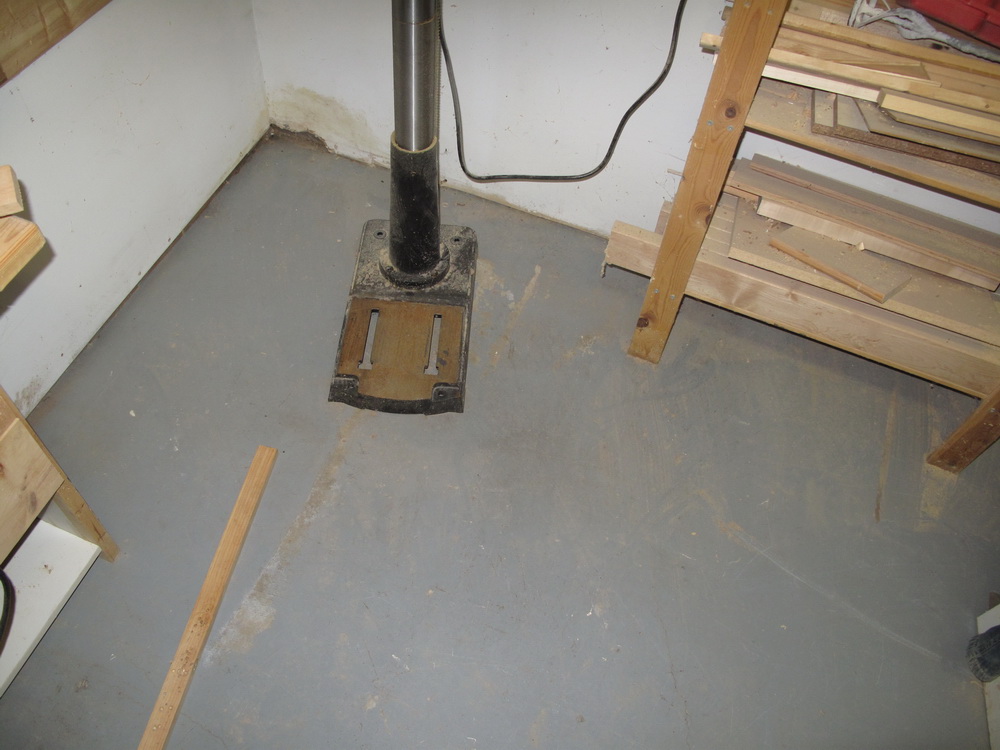
As you can see, that location is occupied by my drill press. And, in spite of the rust visible on the base, this spot was actually dry during the flood. You see, my floor cracked and sank in the middle at some point in the past, bringing the jack posts down with it. When I moved in, the floor in the kitchen sloped downhill to the centre of the house by 2 inches. One of the first things I did was relocate the posts, add a couple more, and jack the house up 2 inches. But, in the meantime, the flood waters pool in the collapsed part of the floor. But that should have no impact on where the water is when it’s under the floor.
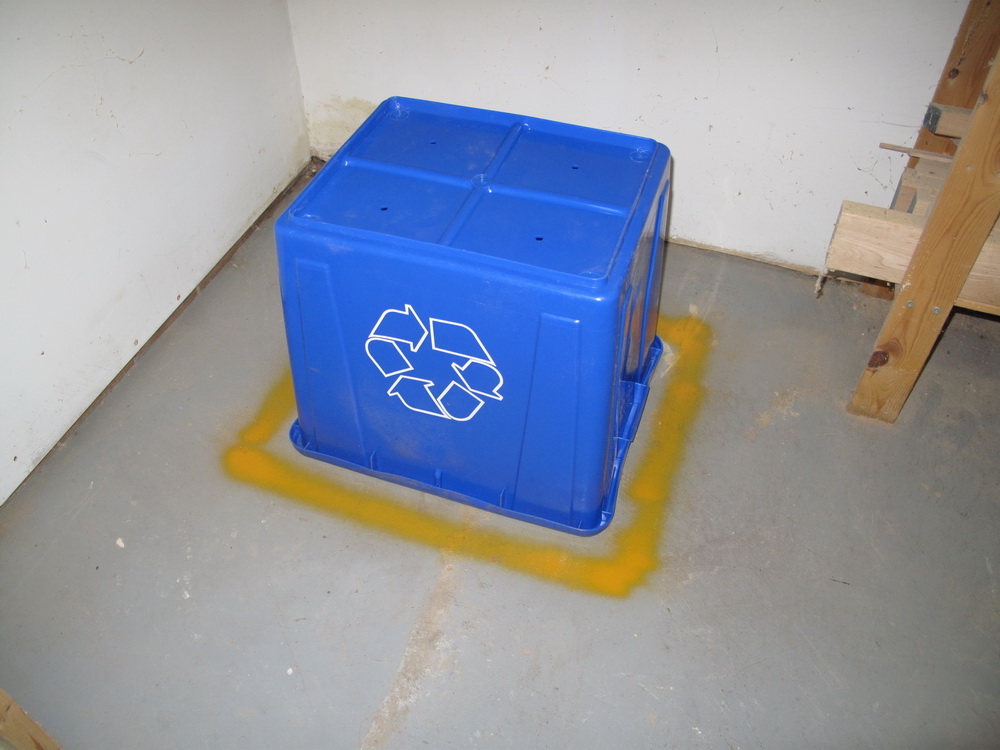
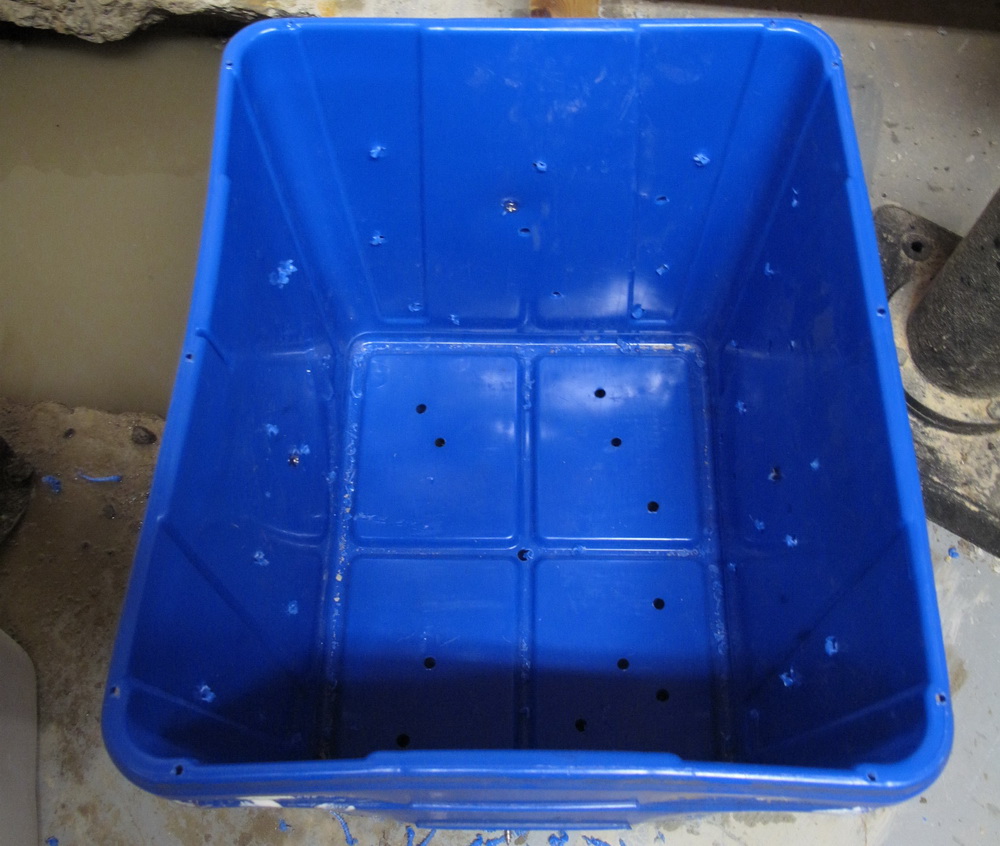
I decided to use a recycling bin for my basin. Here you can see how I marked the floor where the pit should be. Of course, it has to be big enough for the bin.
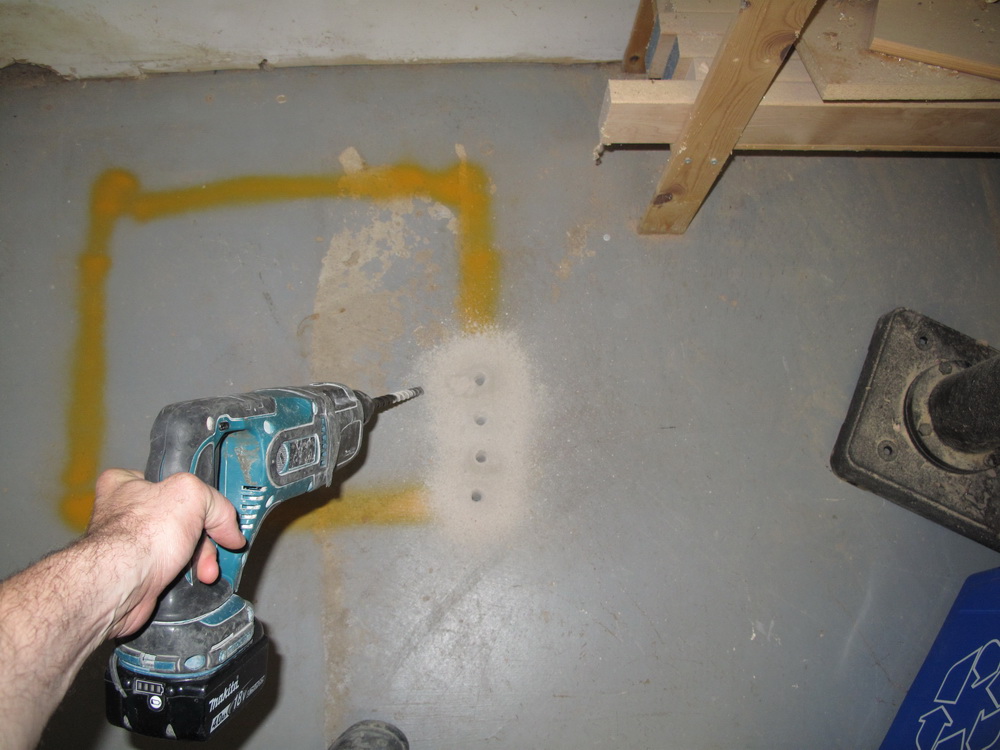
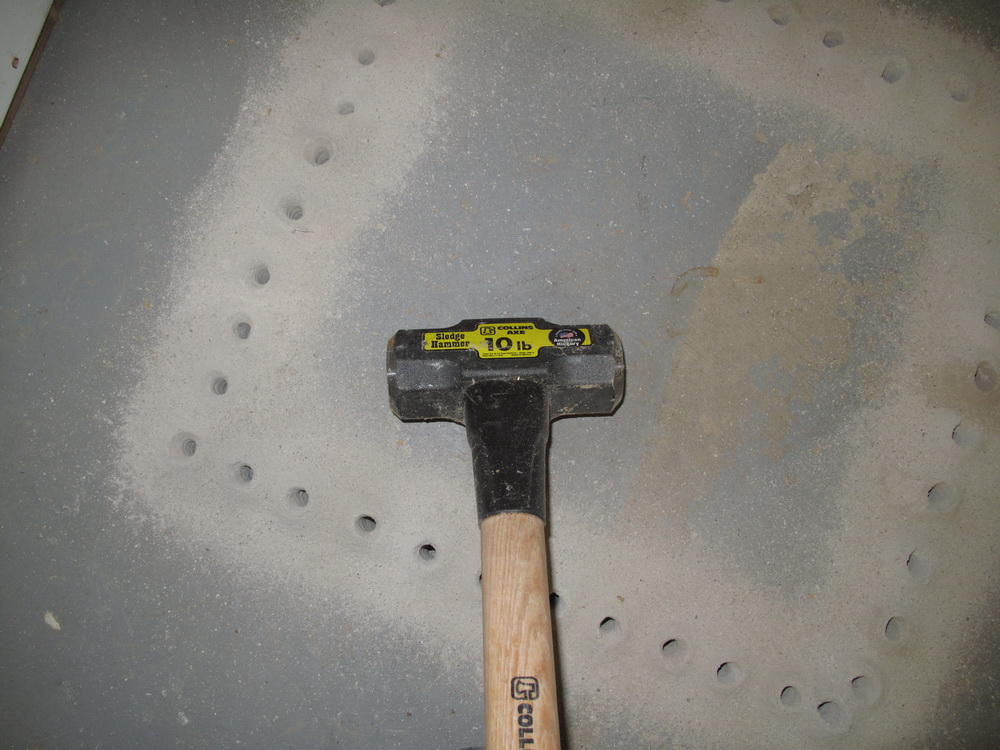
I decided to use a drill bit and sledge hammer to make the hole. I know I have a long SDS bit, either 3/8 or 1/2 inch, but I currently can’t find anything in the workshop. So, I went and bought one. Ain’t it nice and sparkling?

The only drill I own suitable for this job is my cordless rotary hammer drill. I just recently replaced the brushes in it and, since I didn’t want it to suffer a fate similar to what happened to my cordless saw and grinder, I decided to drill a half dozen holes and then let the tool cool down for a few minutes. Let me tell you, this strongly goes against my natural inclination, which is to do everything all at once.
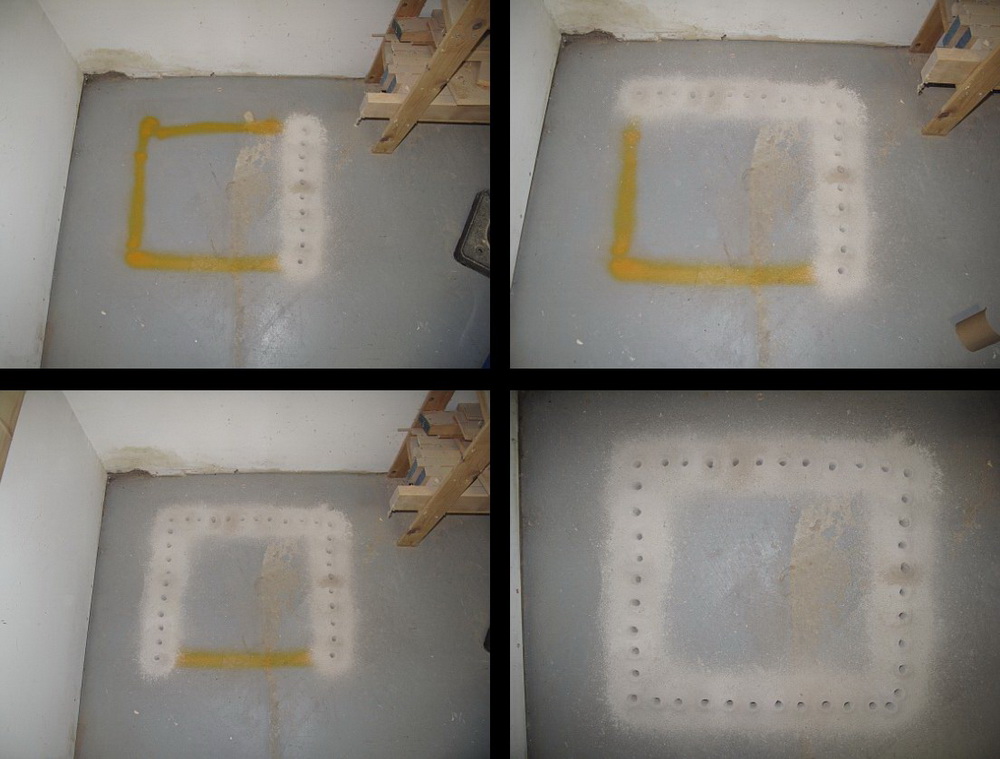
Here’s the way it ended up looking. With a nice outline of holes, it’s as good as a saw cut, but all the dust is just what you see around the holes. instead of coating everything in the house.
And this, of course, is the thing that really gets the work done:
It took a lot less time to smash the concrete away then it did to drill all those holes. I was a little surprised once the concrete started to break. Only the top inch or so was actually hard. The few inches underneath crumbled into gravel with no effort. It makes me think either the mix was too weak (unlikely) or the gravel was already pretty wet when they poured the floor (more likely). Here you can see the water was just below the floor. In spite of how the photos look, the concrete was actually a full 4 inches thick.
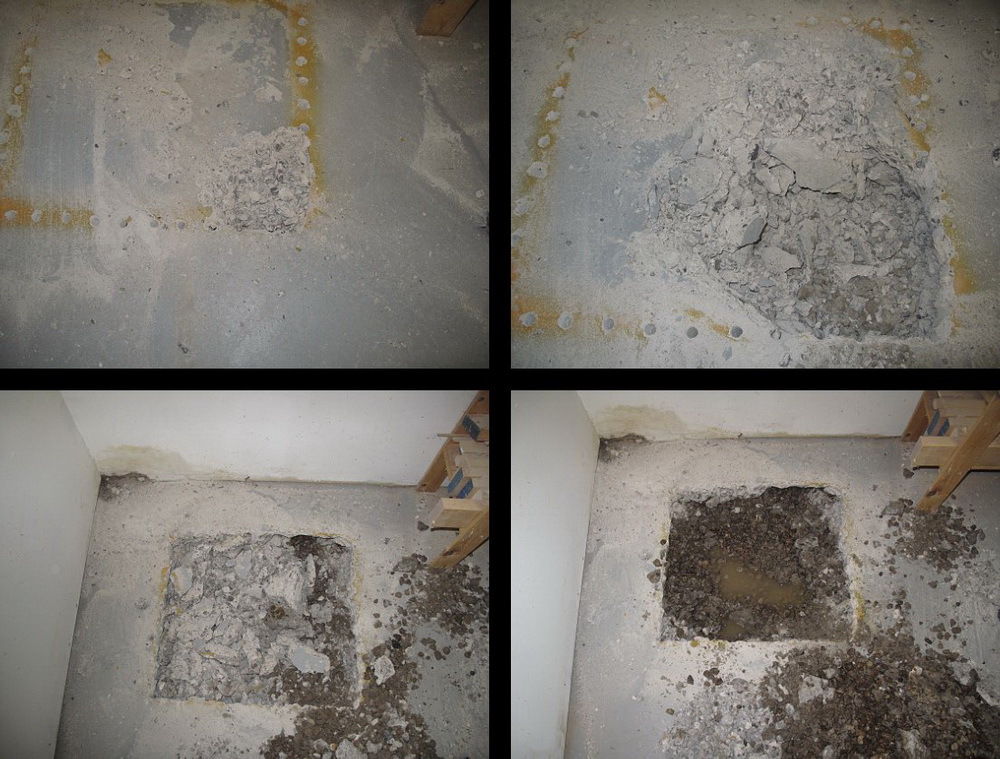
The actual fun began after the concrete was smashed. Then it was necessary to shovel out enough room to sink the pit basin down. The digging started well enough, with crumbled concrete and decently clean gravel (even more clean, since it was all sitting in water). But there was only a couple of inches of gravel, under which was mud that resembled pottery clay. It came out in tiny pieces that clung to the shovel like …. You can imagine. Anyway, here’s a picture of a nice big piece of it. I think that weighed about 30 pounds.
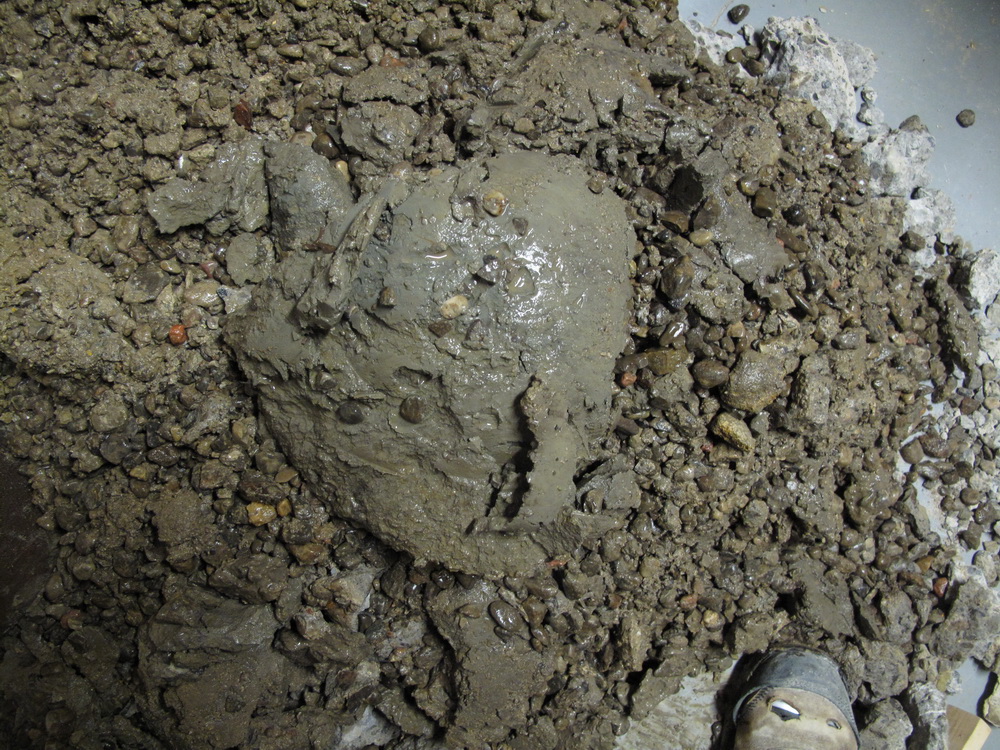
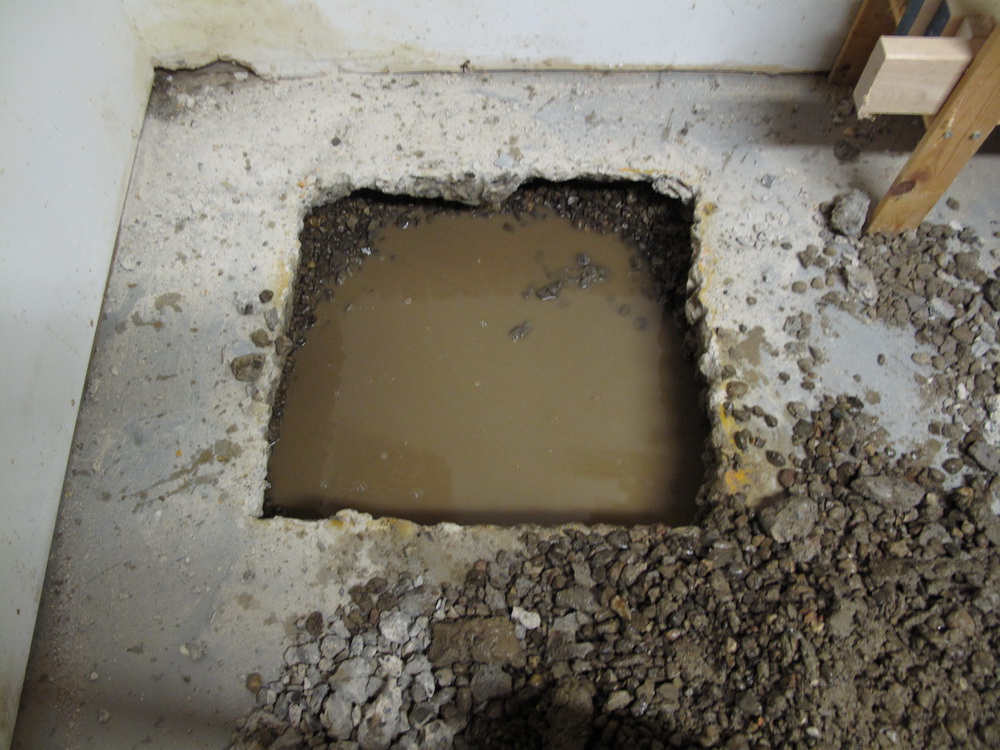
I have never liked shoveling mud. It’s heavier than dirt. It’s harder to get into the shovel than dried clay. The mud under the shovel acts like a suction cup when you try to lift. Half of the mud slides off as you lift the shovel out of the water. Then, of course, and the very best: More mud falls into the hole you’re digging. There’s no winning shoveling mud. You can see from the following picture, even after getting all the gravel out and some big pieces of mud, the hole looks completely insignificant.
It took an hour or so to get enough out of there. Once that was done, I drilled a lot of 1/2 inch holes in the recycling bins. I decided to screw two bins together using stainless steel hinge screws, since I thought a single bin might collapse under the pressure of the mud. The holes were drilled through both. I’m not confident that it’s exactly enough holes, so I plan on drilling more holes close to the top when I feel like looking at this sickening thing again.
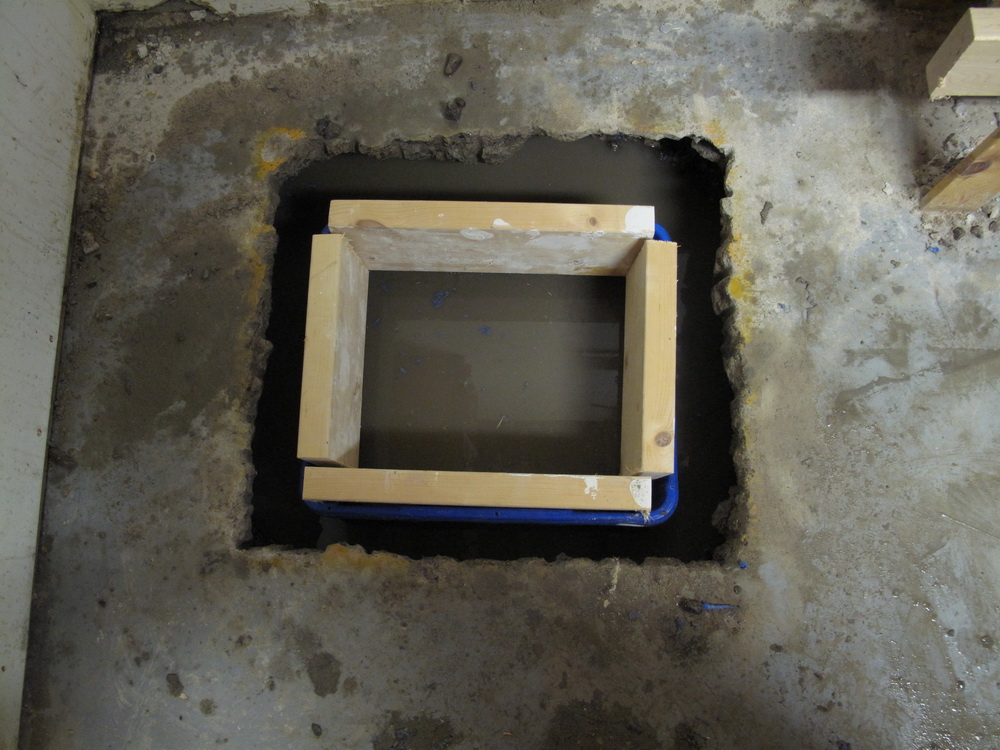
I screwed 2x6s around the top to extend the bins up to the surface of the concrete. Then I pushed it down into the hole. Of course, I had to pull it out and dig more mud out at the corners, but only twice. The wood makes the bins 4 inches taller and the top is flush with the floor surface. I thereafter screwed 2x4s across the top and to the floor to keep everything where it should be.
Then, I had to get a pipe out through the wall, above ground level, so about 7 feet above the floor. I cut through the drywall and then drilled some holes in a circle.
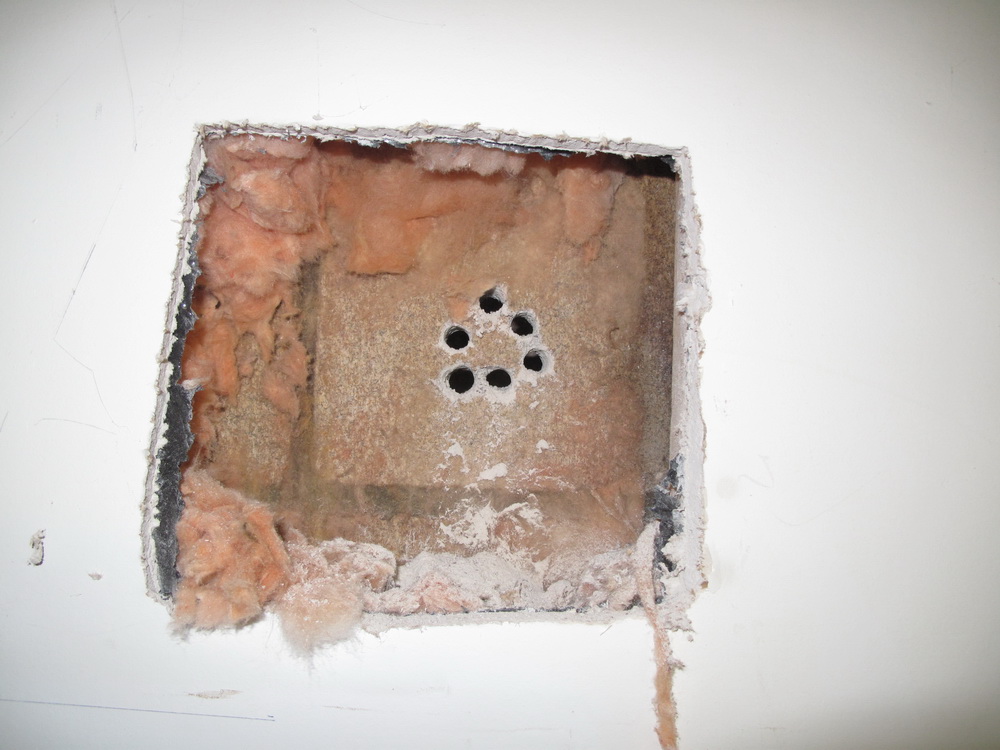
I smashed through with a chisel and drilled through to the outside. Then I had to go out in the rain and enlarge the hole from out there.

I put my (rather lacking) plumbing skills to work and glued up a 90 degree angle of pipe to shove out through the wall. It just goes straight out. I don’t care where the water goes once it’s outside, the point is to get it out of the house. I may change that at a later date.
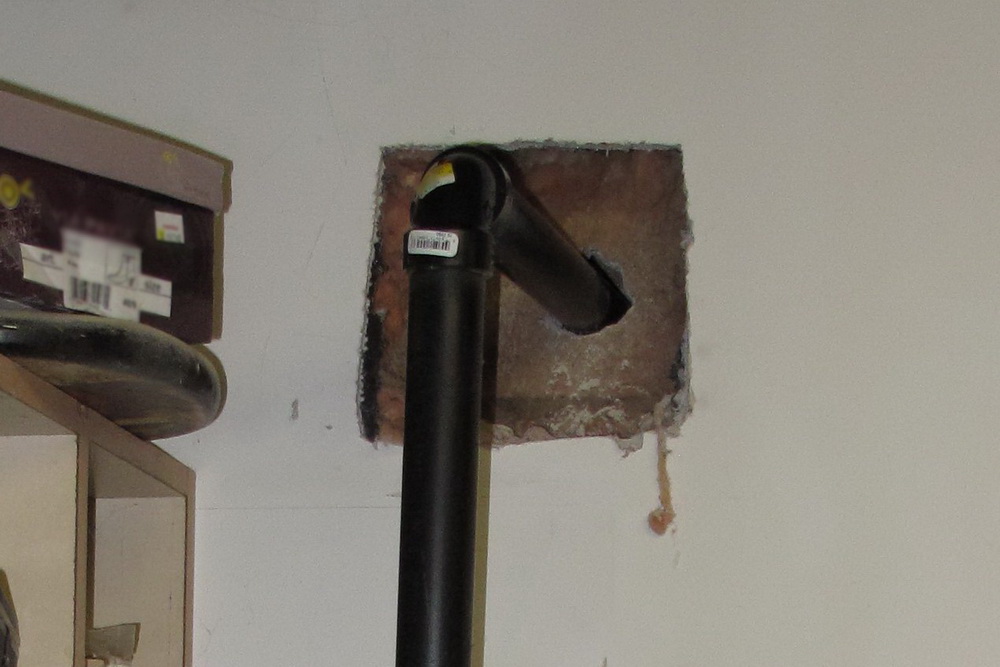
I then attached a section of pipe from the pump up about 4 feet. That pipe meets the upper pipe at a rubber junction, held by clamps. That’s useful if I ever need to pull the pump out. I also used a full tube of caulking to seal the pipe in the block wall. Nothing will be getting in through there. And the pipe will never come out, either.
Then it was done:
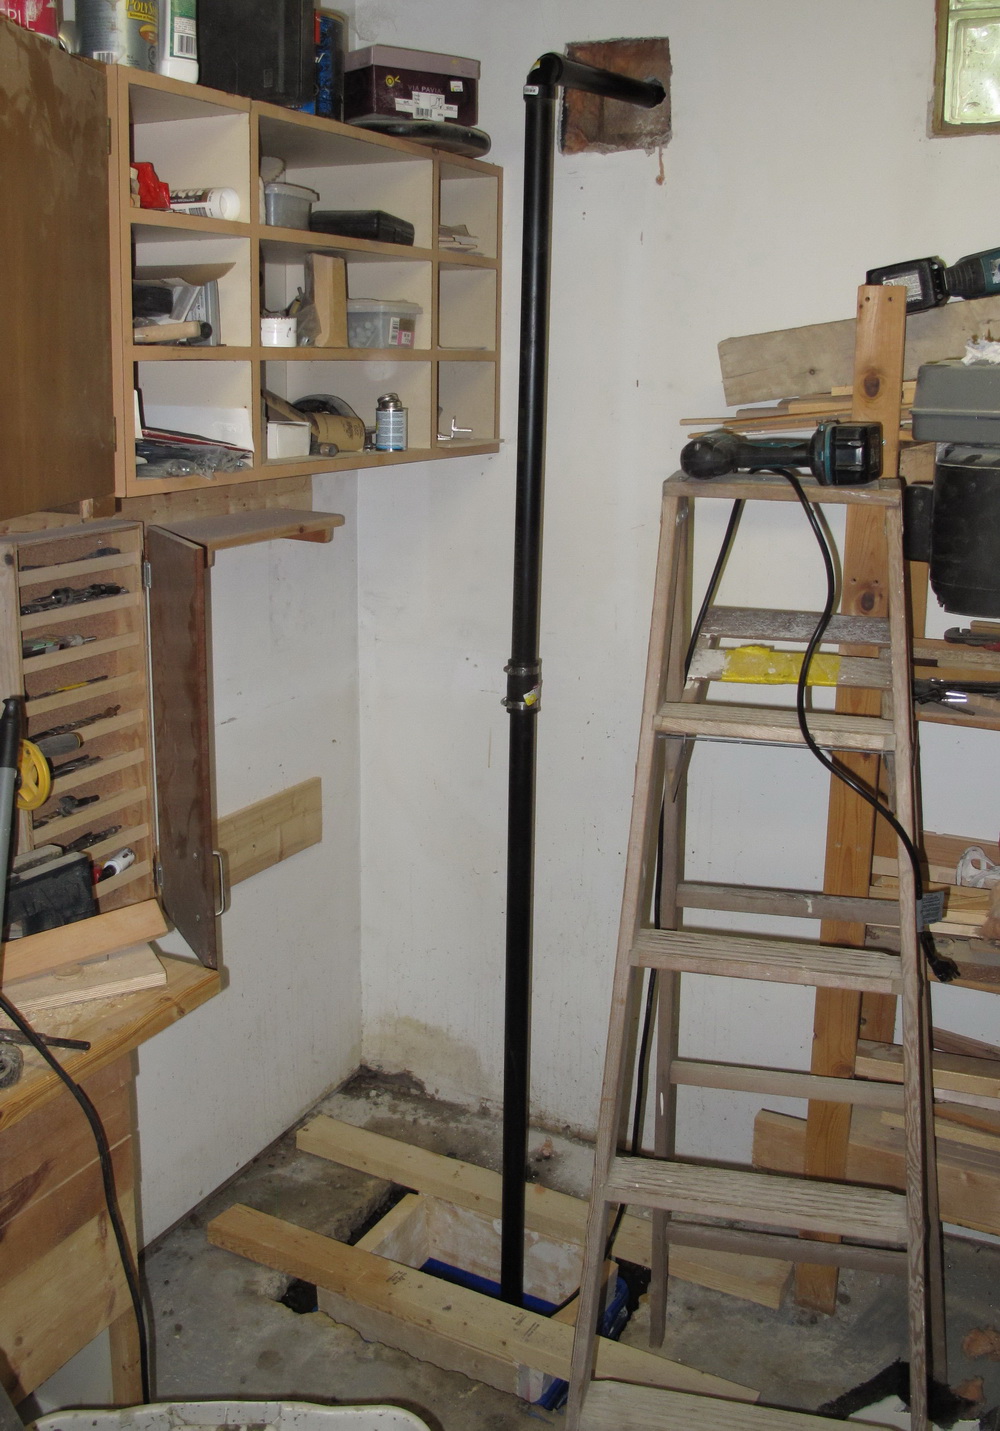
Altogether, it took about 5 hours. There is, of course, some more to do. I need to cover the hole. I need to try to protect the pipe somewhat (I can be a bit careless with wood in the shop). And I may need to redirect the water leaving the house. But this pump doesn’t run for no reason – it should really only run if the basement is going to flood. I’m certain the normal state is for water to be sitting just a few inches under the bottom of the concrete floor. I have to routinely check to make sure it’s working. And I have make sure I don’t unplug it to plug in a battery charger or something else stupid. And I have to find a new location for my drill press.
I’m completely at a loss where I could put that, unfortunately. It seems my shop only gets smaller. But hopefully, from this point on, it will stay dry.
Don Heisz is the author of Offcuts and of other occasional articles here on iBuildIt.ca.


