


How To Make The Ultimate Wooden Clamp Homemade Woodworking Tools
Really? Ultimate? That’s a word that gets thrown around a lot these days, especially on places like YouTube where you need to get the viewer’s attention. I try to use it sparingly and appropriately, even though getting the viewer’s (and reader’s) attention is crucial for what I’m doing. It fits for this clamp, though.
I’ve designed and made several over the years and everything I learned from that has gone into this one. It hits all of the key points – it’s simple and easy to make, it uses commonly available material and hardware, and it works exactly like the clamps you can buy. It even has an advantage over the metal retail clamps: weight. These are more than capable for every woodworking task, but they are a dream to use because the are light.
Materials and Prep
It usually doesn’t take much longer to build several at a time when making small projects like this. The parts are all the same with the same setup for each operation, and it’s that setup time that adds up and eats the day. So I figured I make ten new clamps and through that it would be a good use for the pieces of semi-spalted maple I have:

I say semi-spalted because the spalting isn’t remarkable enough to make the wood special. It’s also chock full of powder post beetle holes and tunnels that lowers the value but doesn’t decrease the strength significantly. This is wood harvested from a tree that I had cut down in my yard a few years ago. It’s dry and well seasoned.
First I sorted through the rough boards and figured out what I could get from each one. Some of these were badly bent and twisted, but none of the parts I need are especially long or wide. The longest are the bars themselves and I easily got ten:

I did all of this project on my table saw and miter saw, cutting the parts from rough lumber. Of course you can use a jointer and planer to flatten and smooth the stock if you have those tools, but they aren’t necessary for this project. A good sharp table saw blade in a well aligned saw with produce surfaces smooth enough for these clamps.
After a lot of cutting I had all of the wooden parts made and ready for further processing and assembly:

I recently added a small computer to my shop with a big screen and that is really handy for the plans. A tablet or phone or even good old fashioned paper with the plans printed on it works great, too.

Still (at the time of writing this…) need to make a filler panel to cover the wires and such between the TV and my homemade sound bar below it.
I always make a list of the parts needed, how many of each and the size, when building several of the same thing. I can then check these off as I get each one done:

If you can read my atrocious hand-“writing”, you can use this when you build your own. Just change the number of each one needed and assume I didn’t make any mistakes… 🙂
I scrounged up enough bit and pieces of 3/8″ threaded rod to get enough for the ten new clamps. Those plus the same number of t-nuts, 1/4″ washers and regular nuts are all that’s needed.

And a single #4 screw to hold the t-nuts in, as well. I used a 23 gauge pin nailer to keep the parts lined up while I used more wooden clamps to clamp them.
The magic powder: sand that’s been bonded to cloth. Otherwise known as sanding belt. I use 60 grit and it should be new and not used, worn-out stuff:

I tried self adhesive sanding disk and that works, but the glue they use on those may start to come loose over time. Better to use a real sanding belt with a strong glue, like epoxy.
I like to make my handles square with a taper on the front. A simple plywood jig gets makes cutting that taper with a table saw a much less risky affair. The other piece of ply with drywall screws is the holder. It locks onto the jig and the handle while pushing the handle into the blade. The build video at the bottom of this page shows this in better detail:

The handles have a 2″ deep hole to glue the threaded rods into.

The most complex part is the moving jaw pad. It has a counterbore and through hole for the nut that will be on the end of the threaded rod. It also has a cut-out that lets it fit around the bar and keeps it from twisting:

Assembly
There are two parts that need a longer drying time for the glue to start assembly. The first is the sanding belt on the moving jaw. I used strong polyurethane construction adhesive for mine, but epoxy or even a thicker super glue will work as well:

These are shown with the sanding belt a bit longer than ideal. The correct length is in the plans.
I used the same glue to fasten the threaded rods in the handles. I ground a flat spot on each threaded rod before gluing them in to “key” them and help keep them from turning loose:

I left these to dry overnight. Also possible to drill a hole through for a locking pin and then move along with the rest of the assembly without waiting for the glue to set.
A simple holding fixture keeps the parts lined up while the fixed jaw is assembled:

I got these finished while waiting for the glue to dry on the threaded rods / handles and moving jaw / sanding belt. Also took the time to cut the optional angle on the end and sand them smooth. Leaving the angle uncut will make the clamps easy to stand up on end:

The moving jaw bottom needs a taper cut as well, and I’m using that plywood jig again to do that:

This is just a relief cut to allow the wooden spring to operate, so it doesn’t have to be Nasa precision. Same drywall screw holding apparatus, but smaller this time:

Again, the build video shows this action in better detail.
The glue that holds the wooden spring to the moving jaw bottom needs to set completely before putting any pressure on the spring. I left mine overnight:

After the glue set on the sanding belt, I glued the moving jaw to one of the moving jaw sides. I did that five time and clamped them all with three of my older wooden clamps:

I know, all you see is wood! But the parts are in there… look closer.
Then when those dried I could glue on the moving jaw bottom / wooden spring using the clamp bar as a spacer. The yellow arrow shows a slight taper that’s cut on the front on the moving jaw to allow the jaw to rotate forward to move it back and forth on the bar easily:

With the moving jaw assembled it’s a good idea to test it on the bar to check that it moves and locks properly before gluing on the other side:

This design is pretty forgiving and you really have to work at messing it up enough to keep the moving jaw from working. I added in the moving jaw pad and jaw pads just to give an overview of the major parts left to assemble.
With the other side glued onto the moving jaw I drilled the hole through for the lead screw (threaded rod). A t-nut goes on the correct side and you need to drill holes for the fangs on the t-nut or they will split the wood. Luckily, I only drilled those holes on the wrong side of one of the moving jaws:

The spring shows the right side: open means you need to flip it over.
Here are three with the t-nus installed. On the right side:

And a single #4 screw to hold it in:

Then the lead screw can be threaded through the moving jaw and the moving jaw pad slipped on with the counterbore facing out. The nut is threaded on and it fits inside that counterbore:

You need to keep the nut from turning after it’s in place and the easiest way to do that is to peen it onto the lead screw. I use a small anvil and a few solid blows from my fancy hammer to get that job done:

Then the end of the lead screw can be greased, the washer put in and the pad glue on to keep it all in place:

The lead screw needs to turn freely and shouldn’t be binding.
I used the clamp itself to clamp on the (optional) pad on the other end and it was done:

And shortly thereafter, they were all done. Even though I’ve only got half of them in this picture:
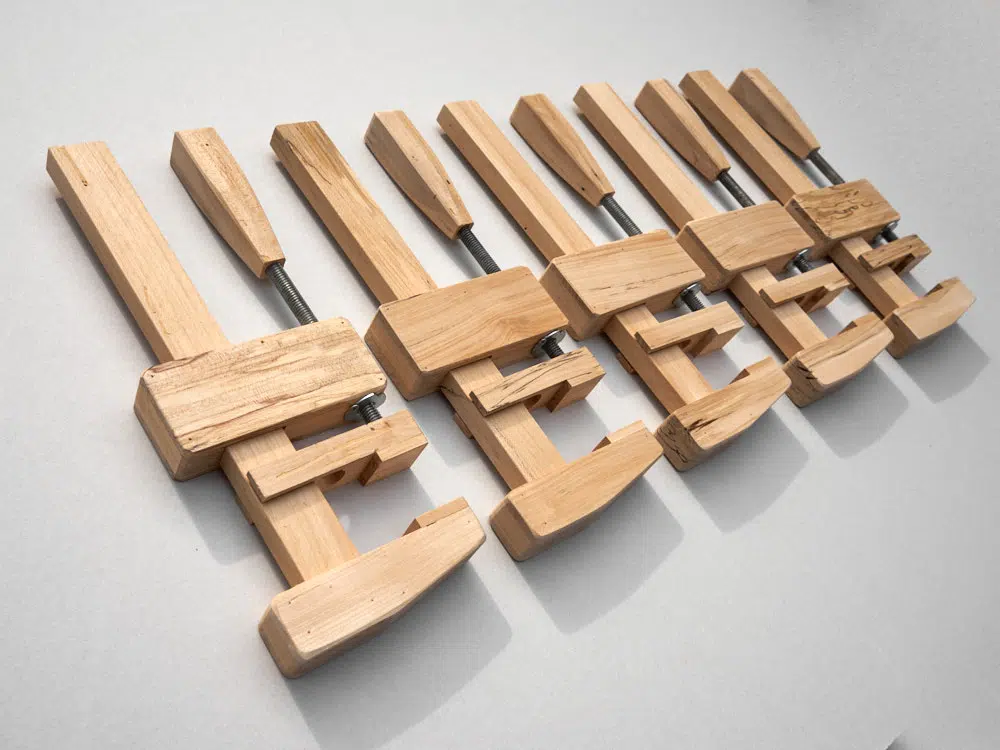
These are the best looking five for the picture.
I sprayed on two coats of water based polyurethane to keep them looking clean and help keep glue squeeze-out from sticking. These are some very fine looking clamps if I do say so myself!
The very excellent well paced and concise build video:


