Making A Wooden Compass Homemade Woodworking Tools
While I’m calling this a compass, I mainly made it to use as dividers to scribe cabinets and other items for a tighter fit. It is, of course, perfectly capable of drawing circles of various sizes, but I much prefer to use my compact compass for that.
To start, I cut two pieces of hardwood (I used oak) from a larger block for the legs of the compass. I designed this on the fly, but had a pretty good idea how big the parts needed to be – each leg started as 1/2″ x 1″ x 8″, leaving them a bit long, for now. I then cut a 1-1/4″ half lap in the top and thinned the rest down to 1/2″ x 1/2″:

Both legs are identical and that makes it easy to cut out both at the same time.
With the legs put together, I drilled a counterbore and through hole for the #10 pivot screw:

And then glued that screw in with epoxy to keep it from turning after sanding away a bit of each half lap for clearance to allow the legs to open:

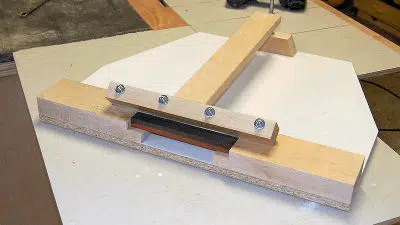
This has a spike in one leg and a pencil holder on the other, and here I’m setting up to drill the hole in the end of the leg for the spike. This is easier to see in the video at the bottom of this page, I want the spike to be angled inwards slightly and made a drilling guide from one of the end pieces I cut off the legs to make them the right length (6-1/2″):

I’m using my power wedge bar clamps to hold the leg and the guide down on my drill press table, and drilled the hole with my handheld drill.
The spike is actually an old drill bit the same size as the hole and I just sharpened the smooth end to a point. I also tapered the legs in at the ends to reduce the bulkiness:

The pencil hold is another piece of hardwood with a 19/64″ hole drilled close to the edge:

The pencil should be a relatively snug fit in the holder, but not too tight.
I then drilled and tapped a hole for a short #10 screw to hold the pencil in:

I took the time to line up the holder with the pencil in it on the leg to get the right angle, then cut that on the band saw and sanded it flat on my belt / disk sander:

After the glue dried on the pencil holder I sanded the legs smooth and sprayed on three coats of clear finish:

I could have just left the screw as it was, but decided adding a knob to the head would make it look and work better – more finished. I used a piece of the same oak and drilled a counterbore deep enough for the head and glued it in:

After cutting it out on the band saw, I fine tuned the shape on my belt / disk sander:

And then gave it a couple of coats of spray finish as well:

The “money” shots:


An interesting and enjoyable project, it’s also a valuable addition to the workshop.
I made a video showing the build: